Mastering the Design Thinking Process Steps
Unlock innovation with our guide to the 5 design thinking process steps. Learn Empathize, Define, Ideate, Prototype, and Test with actionable examples.The design thinking process offers a structured, human-centered way to solve complex problems by starting with people first. It’s built around five core phases: Empathize, Define, Ideate, Prototype, and Test. But don't think of it as a rigid, linear checklist. It's an iterative loop that ensures the solutions we build aren't just technically possible but are genuinely desired and useful to the people who will use them.
A Human-First Approach to Problem-Solving
At its heart, design thinking is a problem-solving mindset. It's a powerful framework for cutting through ambiguity and transforming a fuzzy challenge into a concrete, user-centric solution. Instead of jumping to a solution based on assumptions, the process forces you to start by deeply understanding the human needs driving the problem in the first place.
This approach is crucial because it stops teams from building products in a vacuum. When you ground your work in real user insights, you dramatically increase the chances of creating something that's not just wanted, but genuinely useful. An actionable insight from this is to always have a "user quote" or a key observation from the Empathize phase visible throughout the project to keep the team grounded.
Thinking Like Your Users
The real magic of design thinking is its relentless focus on the end-user. It's all about fostering curiosity and encouraging your team to question every assumption. What do our users really need? What are their hidden frustrations and deep-seated motivations? Answering these questions is the bedrock of true innovation.
By putting people at the center of the conversation, the design thinking process completely changes how we solve problems. It shifts the focus from making things for users to making things with them, building a culture of constant learning and improvement along the way.
The framework really gained traction after being popularized by Stanford's d.school. Their five-step model provides a clear, actionable path for creative problem-solving. This structure guides teams through distinct phases of inspiration, idea generation, and implementation, with the flexibility to loop back and refine as they learn more. In fact, it's just one of several effective user experience methodologies you can use to build better products.
The infographic below lays out these five steps, showing how the process flows from understanding user needs to validating the final solution.

As you can see, it's a connected, iterative cycle. What you learn in one stage directly fuels the next. Before we dig into each phase, let's get a high-level view of the entire process.
The 5 Core Steps of the Design Thinking Process at a Glance
This table breaks down each of the five phases, explaining its main goal and the central question your team should be asking.
| Step | Core Purpose | Key Question to Answer |
|---|---|---|
| Empathize | To gain a deep, personal understanding of the user's needs, motivations, and pain points through observation and engagement. | "What does the user truly feel, think, and experience?" |
| Define | To synthesize research findings into a clear, actionable problem statement that is framed from the user's perspective. | "What is the specific, human-centered problem we are trying to solve?" |
| Ideate | To generate a wide range of creative ideas and potential solutions without judgment, encouraging divergent thinking. | "How might we solve this specific problem in new and innovative ways?" |
| Prototype | To create low-cost, tangible versions of potential solutions that can be tested and explored. | "How can we make this idea real enough to test and get feedback?" |
| Test | To gather user feedback on the prototypes, learn what works and what doesn’t, and refine the solution iteratively. | "Does this solution effectively meet the user's need in a real-world context?" |
This framework gives you a clear path forward, but remember that the real breakthroughs happen when you embrace the flexibility to move between these stages as needed.
Uncovering the Real Problem with Empathy
It’s human nature to jump straight to solutions. The minute a problem pops up, our brains are wired to start brainstorming fixes. But the very first—and most crucial—step in design thinking is to fight that instinct. Instead, we have to start by building genuine empathy.
Truly great products don’t begin with a clever idea in a boardroom. They begin with a deep, almost obsessive, understanding of the people you’re designing for. This entire phase is about setting aside your own assumptions, becoming a patient observer, and really listening. The goal is to get past the surface-level wants and uncover the unspoken needs and frustrations that truly drive behavior. This foundational work ensures you're solving a problem that actually matters.
Moving Beyond Simple Surveys
While a survey can give you some handy numbers, it’s not where the gold is buried. Surveys are great for what, but they rarely tell you why. Real empathy comes from getting out of the office and engaging with people in their world.
Let’s imagine a local gym is seeing its member retention numbers drop. The management’s first thought is that the equipment must be outdated, and they start looking at a costly renovation. But before dropping a ton of cash, they decide to try the Empathy phase first.
Instead of a generic survey asking, "What new equipment would you like?" they try a few different things:
- Contextual Interviews: They just hang out at the gym, striking up casual conversations. They ask open-ended questions like, "Tell me about your last few visits here," or "What was the toughest part about getting into a routine?"
- Fly-on-the-Wall Observation: The team just watches. They quickly notice a pattern: newer members seem lost, sticking to the same few cardio machines by the door. They rarely venture into the free weights area, which is usually full of seasoned lifters.
- The "Five Whys" Technique: During one chat, a member says they don’t come as often as they’d like. The interviewer gently digs deeper:
- Why? "I'm just not that motivated lately."
- Why? "I don't really feel like I'm making any progress."
- Why? "To be honest, I'm not sure I'm doing the exercises correctly."
- Why? "I feel too embarrassed to ask anyone for help."
- Why? "Everyone else here seems to know exactly what they're doing. I feel intimidated."
Boom. This simple technique peels back the layers. The problem isn't the equipment at all; it’s a much deeper emotional issue of gym intimidation and a lack of confidence.
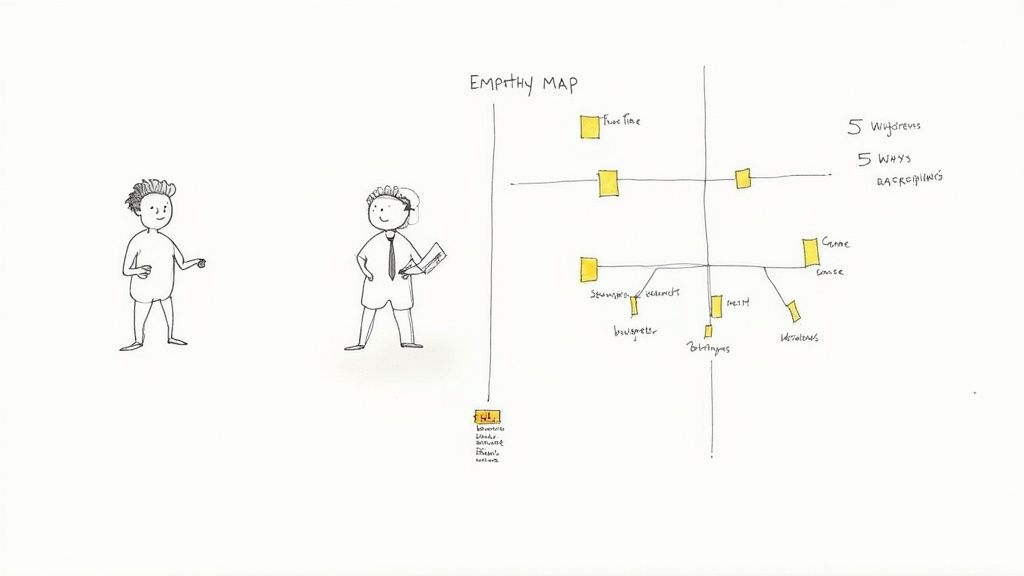
Making Sense of It All with Empathy Maps
After gathering all these stories and observations, you need a way to organize them so your team can see the patterns. This is where an empathy map comes in—it's a simple but powerful tool for getting inside a user's head. It’s a collaborative visualization that helps your team build a shared understanding. An actionable tip is to print it out and post it on the wall for the duration of the project.
| Quadrant | What It Captures | Gym Member Example |
|---|---|---|
| Says | Direct quotes and statements you heard during interviews. | "I wish I knew how to use more of the machines." |
| Thinks | What the user might be thinking but not saying aloud. | "I feel like everyone is watching me and judging my form." |
| Does | The actions and behaviors you observed. | Sticks to treadmills; avoids the weight room; leaves quickly. |
| Feels | The emotional state of the user. | Anxious, overwhelmed, self-conscious, intimidated. |
This process transforms scattered notes into a coherent picture of a real person. The team is no longer solving for a generic "member"; they're solving for someone who feels anxious and unsupported. That clarity changes everything.
The idea of involving users isn't new. Design thinking's roots trace back to Herbert A. Simon's 1969 book, The Sciences of the Artificial, which introduced concepts like rapid prototyping. Later, participatory design movements in the 1970s championed co-creating with users—a principle that is the very heart of the Empathy phase today.
By putting empathy first, the gym team has completely reframed its challenge. The problem isn't a lack of modern treadmills; it's a lack of community and guidance for beginners. Armed with this powerful insight, they're now ready to define a much more meaningful problem and ideate solutions that will actually boost member retention. Honing the skill of how to conduct user interviews is foundational here, as it provides the raw material for everything that follows.
Turning Insights into Actionable Ideas
Alright, so you’ve done the deep dive. You've sat with users, listened to their stories, and walked in their shoes during the Empathy phase. The result? A crystal-clear, human-centered problem statement that gets to the heart of the matter. That clarity is your launchpad.
Now comes the fun part: Ideation. This is where we shift gears from understanding the problem to dreaming up ways to solve it. The mission here isn't to find the perfect idea right out of the gate. Far from it. The real goal is to go wide, to generate a massive volume of ideas and explore every possibility, no matter how wild or unconventional it seems.
Think quantity over quality at this stage. By casting a wide net, you create a rich pool of concepts to pull from, dramatically increasing your odds of landing on a genuinely breakthrough solution. An actionable insight here is to set a specific, ambitious quota, like "100 ideas in 30 minutes," to force the team past the obvious solutions.
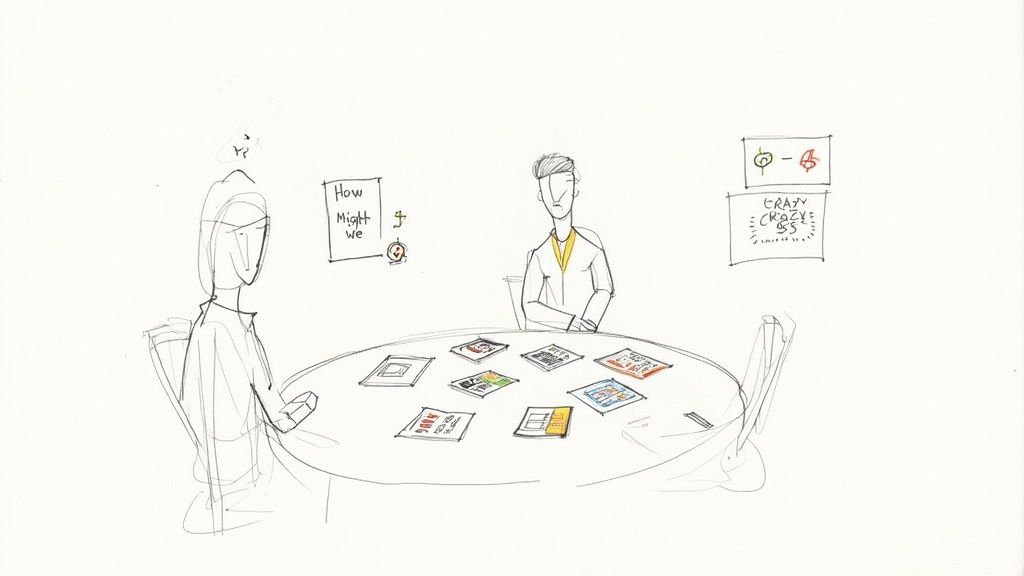
Framing the Creative Challenge with "How Might We"
Before your team even picks up a sticky note, you need to frame the challenge in a way that sparks creativity, not paralysis. I’ve found one of the most powerful (and simple) techniques is to reframe your problem statement into a series of "How Might We" (HMW) questions.
This subtle linguistic shift is a game-changer. It transforms a heavy, daunting problem into an optimistic and approachable challenge.
Let's go back to our gym example. The team discovered that new members feel intimidated and lack confidence. Instead of getting stuck on "New members are intimidated," they can flip the script and ask:
- How might we make the gym feel more welcoming for beginners?
- How might we help new members build confidence in their first month?
- How might we create a sense of community for people who work out alone?
See the difference? HMW questions are open-ended invitations to innovate. They're the starting blocks for a truly productive ideation session.
Structured Brainstorming for Maximum Creativity
Let's be honest, most brainstorming sessions are a mess. The loudest person in the room tends to dominate, and genuinely good ideas get lost in the chaos. That’s why I always rely on structured techniques to ensure everyone gets a voice and the team is pushed beyond the obvious, low-hanging fruit.
One of my absolute favorites is Crazy 8s. It’s a high-energy sketching exercise that forces you to generate eight distinct ideas in just eight minutes. Each person folds a piece of paper into eight rectangles and has one minute to sketch an idea in each box.
The magic of Crazy 8s is that it forces you to move past your first, most obvious idea. By the fourth or fifth square, you're forced to think more creatively, often leading to unexpected and valuable concepts.
For our gym team, a quick Crazy 8s session could spit out a whole range of solutions for member intimidation:
- A "buddy system" feature in the gym's app to connect new members.
- Designated "beginner-only" workout zones with simple instructions.
- A series of free, small-group orientation classes.
- Gamified workout plans that unlock rewards as members try new equipment.
- A mentor program pairing new members with experienced regulars.
- Color-coded equipment based on difficulty level.
- "Ask a Trainer" hours with staff dedicated to answering questions on the floor.
- A digital library of short video tutorials for every machine.
Expanding Ideas with the SCAMPER Method
Once you have a solid collection of raw ideas, you can use a framework like SCAMPER to refine and build upon them. SCAMPER is just an acronym for seven different prompts that help you look at an existing idea from a new angle.
- Substitute: What if we replaced the human gym buddy with a virtual AI coach?
- Combine: Could we combine the buddy system with the orientation classes? Maybe a group class that ends with pairing up partners.
- Adapt: How can we adapt a concept from another industry? Look at how Duolingo uses daily streaks to keep users engaged.
- Modify: What if we changed the scale? Instead of a full mentor program, what about one-off "workout with a pro" sessions?
- Put to another use: Could the buddy system be used for something else, like nutrition accountability?
- Eliminate: What if we removed the need for a human buddy entirely? Maybe an interactive screen on each machine is enough.
- Reverse: What if experienced members were rewarded for asking beginners if they need help?
Using a structured method like this helps your team flesh out initial thoughts into more robust concepts. Before you jump into prototyping, it's critical to filter these ideas. Knowing how to validate business idea concepts at this early stage can save you an incredible amount of time and money down the road. The key is to create a judgment-free zone for wild ideas, then strategically converge on the ones that have the most potential to solve your "How Might We" challenge.
Phase 4: Bringing Your Ideas to Life with Prototypes
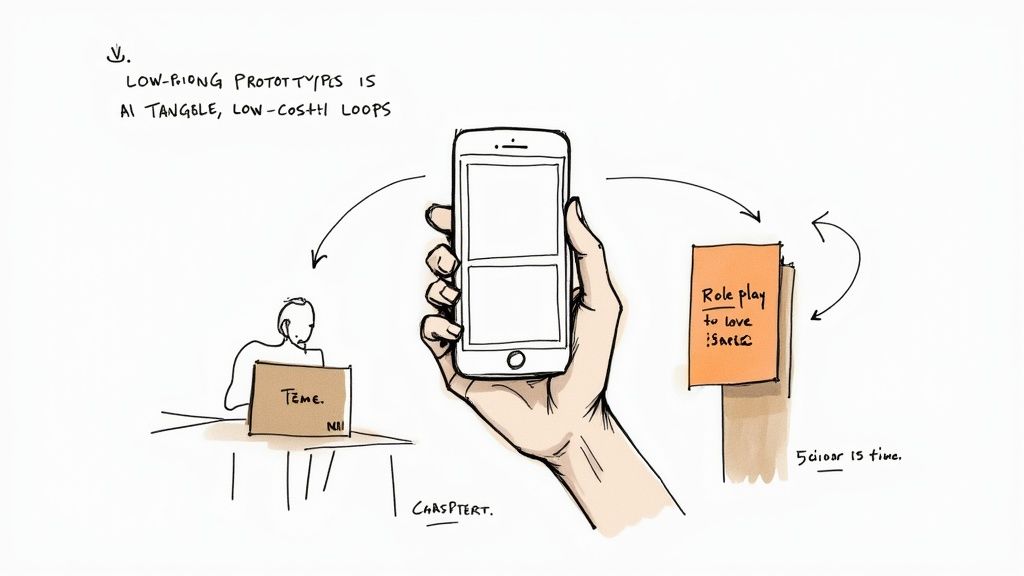
After a whirlwind ideation session, your team is likely buzzing, sitting on a pile of promising concepts. It’s a great feeling, but ideas on a whiteboard are just that—ideas. The prototype phase is where you start making things real, transforming those abstract thoughts into something tangible that users can actually interact with.
This isn't about building a polished, pixel-perfect version of your final product. In fact, it’s the exact opposite. The real goal here is to create a low-cost, low-effort representation of your idea as quickly as you can, so you can learn from it just as quickly.
Embrace the "Fail Fast" Mentality
The guiding principle of prototyping is to fail fast and fail cheap. Seriously. Finding out an idea has a fatal flaw after two days and a few sheets of paper is a massive win. Discovering that same flaw after six months and sinking a huge budget into it? That’s a disaster.
Think of a prototype as a conversation starter. It gives users something concrete to react to, generating far richer, more honest feedback than you’d ever get from just describing an idea. This hands-on approach helps you see what works, what doesn't, and what's just plain confusing before a single line of code is ever written.
Low-Fidelity Prototyping in Action
You don't need to be a skilled designer or have a team of engineers on standby to build a valuable prototype. Some of the most effective methods for early-stage learning are surprisingly simple.
Let’s check back in with our gym team. They're trying to validate their "buddy system" app feature, which is designed to make the gym less intimidating for new members. Instead of jumping straight into development, they could:
- Create Paper Prototypes: The team can literally sketch the app's key screens on separate pieces of paper. To test it, they can have a new member "use" the app by pointing to buttons, while a team member acts as the "computer," swapping out the paper screens in response. It sounds simple, but it’s incredibly effective for testing a flow.
- Role-Play the Experience: Two team members can simply act out the new onboarding process. One plays the role of the nervous new member, while the other plays a staff member introducing the buddy system. This is a fantastic way to test the human side of the interaction and gauge the emotional response.
- Build a Simple Wireframe: For something with a bit more of a digital feel, the team could use a tool like Balsamiq or Figma to create a basic, clickable wireframe. Wireframing is a core skill for mapping out user flow and structure without getting lost in visual design details. Our guide on how to create wireframes is a perfect resource if your team is new to this.
A prototype isn't a product; it's a learning tool. The less time and money you invest in it, the more open you'll be to throwing it away and trying something new based on what you learn from users.
Choosing the Right Prototyping Method
The kind of prototype you build should always match what you need to learn. Are you testing a user workflow? A physical interaction? An emotional reaction? The answer will point you toward the right method. An actionable insight is to write down the single most important question you want the prototype to answer before you start building. This keeps the effort focused.
For example, a low-fidelity prototype like a paper sketch is perfect for testing a core concept and getting a gut check on the user flow. Later in the process, a high-fidelity prototype that looks and feels much closer to the final product becomes more useful for fine-tuning usability and dialing in the user interface.
The key is to match the tool to the task at hand. This table breaks down some common prototyping methods to help you decide which approach is right for your current stage.
Choosing the Right Prototyping Method
| Prototype Method | Fidelity | Typical Cost & Time | Best For |
|---|---|---|---|
| Paper Sketching | Low | Pennies & Minutes | Exploring basic layouts, core concepts, and user flow ideas. |
| Role-Playing | Low | Free & Hours | Testing service interactions and understanding emotional user journeys. |
| Clickable Wireframe | Low-Medium | Low & Days | Testing navigation, information architecture, and task completion. |
| Interactive Prototype | High | Moderate & Weeks | Fine-tuning user interactions, testing usability, and visual design. |
Ultimately, the best prototype is the one that delivers the most learning for the least amount of effort. By making your ideas tangible, you move beyond mere assumptions and start gathering the real-world data you need for the final, crucial phase of the process: testing.
Learning and Refining Through User Testing
You’ve built your prototype, and the idea finally feels real. But arguably the most critical phase is still ahead. This is where your assumptions meet reality—the Test phase. It's the moment of truth where you put your prototype in front of real people and, most importantly, you just listen.
This isn't about defending your idea or convincing users that it's great. It’s about observing, learning, and finding the flaws with humility. The goal is to gather honest, unfiltered feedback that will either validate your direction or give you the clear signals you need to pivot. Every piece of feedback, good or bad, is a gift that makes your solution stronger.
Setting the Stage for Honest Feedback
The quality of your feedback hinges entirely on how you conduct the test. You have to create a comfortable, unbiased environment. Users often feel pressured to be "nice," so your job is to make it crystal clear that you want their gut reactions, not their approval.
Let's go back to our gym team testing the "buddy system" paper prototype. They wouldn't just hand it over and ask, "So, do you like it?" That question encourages politeness, not truth.
A much better approach is to frame it as a task. "Imagine you're a new member who's feeling a bit lost. Use this to find a workout partner for next Tuesday." Then, they sit back and observe. A practical tip: always have one person facilitate the session while another takes detailed notes. It's too difficult to do both well at the same time.
The Power of Thinking Aloud
One of the most powerful techniques you can use during testing is the "think-aloud" protocol. All it means is asking the participant to say whatever is on their mind—thoughts, feelings, frustrations—as they interact with the prototype.
You can encourage them with gentle prompts like:
- "What are you looking at right now?"
- "What do you expect to happen if you press that?"
- "Just tell me what's going through your head."
As the gym member fiddles with the paper screens, they might say, "Okay, I see a list of names... but I don't know who these people are. I wish I could see their fitness level or what times they usually come." That single comment is a goldmine of actionable insight.
The core of the Test phase isn't about asking users what they want. It’s about observing their behavior to understand what they need. Their actions will always speak louder than their words.
Recruiting the Right Participants
Who you test with is just as important as how you test. You absolutely have to recruit participants who accurately represent your target user. Testing a feature for gym beginners with a group of seasoned powerlifters is going to give you completely skewed results.
For the gym scenario, the team should specifically seek out members who joined in the last 30 days. Their experiences and anxieties are fresh, making their feedback incredibly relevant to the problem of member intimidation.
Getting this right has a real business impact. Research shows that companies leading in design see 32% more revenue growth. Another study revealed that 75% of CEOs see design thinking as integral to their success because it improves collaboration and speeds up innovation.
From Feedback to Iteration
Testing isn't the end of the line; it's the engine of iteration. The feedback you collect directly fuels the next loop of the design thinking cycle, connecting all the phases.
After testing the buddy system prototype, the gym team might discover several key issues:
- Confusion: Users didn't understand how to actually contact a potential buddy.
- Hesitation: Members felt awkward reaching out to a stranger without more info.
- Excitement: The core idea of finding a partner was a hit, confirming the concept's value.
This feedback doesn't mean the idea failed. It just means the team has specific, tangible problems to solve. Now, they can take these insights and jump right back to an earlier phase:
- Back to Ideate: How might we make that first contact feel less awkward?
- Back to Prototype: Let's whip up a new paper sketch that includes user profiles with fitness goals.
This iterative loop—test, learn, refine, and test again—is the very soul of the design thinking process. Each cycle brings you closer to a solution that genuinely solves the user's problem. Of course, there are many other UX design methods that can complement this testing phase to create an even more robust development cycle.
A Few Common Questions About Design Thinking
Whenever teams start using this framework, a few practical questions always pop up. It's one thing to understand the design thinking process steps in theory, but it's another to apply them in the real world. Let's tackle some of the most common ones I hear.
Do I Have to Follow the Steps in Order?
Not at all. In fact, you shouldn't. While we present the five phases in a neat, linear order for learning purposes, the reality of design thinking is messy, cyclical, and wonderfully non-linear. It's a huge mistake to think you have to perfect the Empathize phase before you can even think about Defining the problem.
Imagine it more as a continuous loop. You might be in the middle of testing a prototype when you suddenly realize you completely misunderstood a core user need. That new insight could send you right back to the drawing board—maybe you need to conduct a few more interviews (Empathize) or even completely reframe the problem (Define).
Think of the five phases as a flexible guide, not a rigid checklist. The real breakthroughs happen when you allow yourself to jump between them as you learn and adapt.
This iterative flow is what makes the process so powerful. It builds in opportunities to refine your solution based on constant feedback, ensuring the final product actually solves the right problem.
How Can This Work for a Small Team or Even Just Me?
Design thinking is surprisingly scalable. Whether you’re a massive corporation or a solo founder sketching an idea on a napkin, the core principles hold true. It’s all about the human-centered mindset and learning quickly, not about the size of your team.
For example, let's say you're a single entrepreneur working on a new productivity app. You can absolutely run this process yourself.
- Empathize: Grab coffee with five potential users and just listen to their workflow frustrations.
- Define: Based on those chats, write out a simple problem statement: "Busy professionals need a way to capture fleeting ideas before they get lost in the shuffle."
- Ideate & Prototype: Sketch out a basic app flow on paper. It doesn't need to be fancy—a few screens is all it takes.
- Test: Go back to those same five people, show them your paper sketches, and watch how they react.
The activities are the same; you just adjust the scale. You don't need a huge budget or a sprawling team to get powerful insights.
What are the Biggest Mistakes People Make?
Even with the best intentions, it's easy to stumble. I've seen teams fall into the same few traps over and over again, so keeping these in mind can save you a lot of headaches.
The single biggest mistake is rushing the early stages. Teams get so excited about building a solution that they barely skim the surface of the Empathy and Define phases. The result? A beautifully engineered product that no one actually needs. Always, always invest the time to fall in love with the problem, not the solution.
Another common pitfall is getting too attached to a prototype. A prototype isn't your precious baby; it's a tool for learning. Its job is to be tested, criticized, and sometimes thrown away entirely.
Finally, don't treat the process like an unbending, step-by-step formula. It's a flexible framework. The real skill is learning how to adapt it to the unique challenges you're facing.
Ready to turn your big idea into a market-ready product? At Pixel One, we specialize in guiding startups and enterprises through every stage of the product journey, from strategy and design to full-stack development. Let's build something amazing together. Learn more at https://www.pixelonelabs.com.