Navigating Product Development Lifecycle Stages
Explore the essential product development lifecycle stages. Our guide provides actionable strategies and real-world examples to turn your idea into a success.Think of the product development lifecycle as the strategic recipe for bringing a great idea to life. It’s the structured journey that takes a spark of inspiration—a raw concept—and methodically shapes it into a polished product ready for the market.
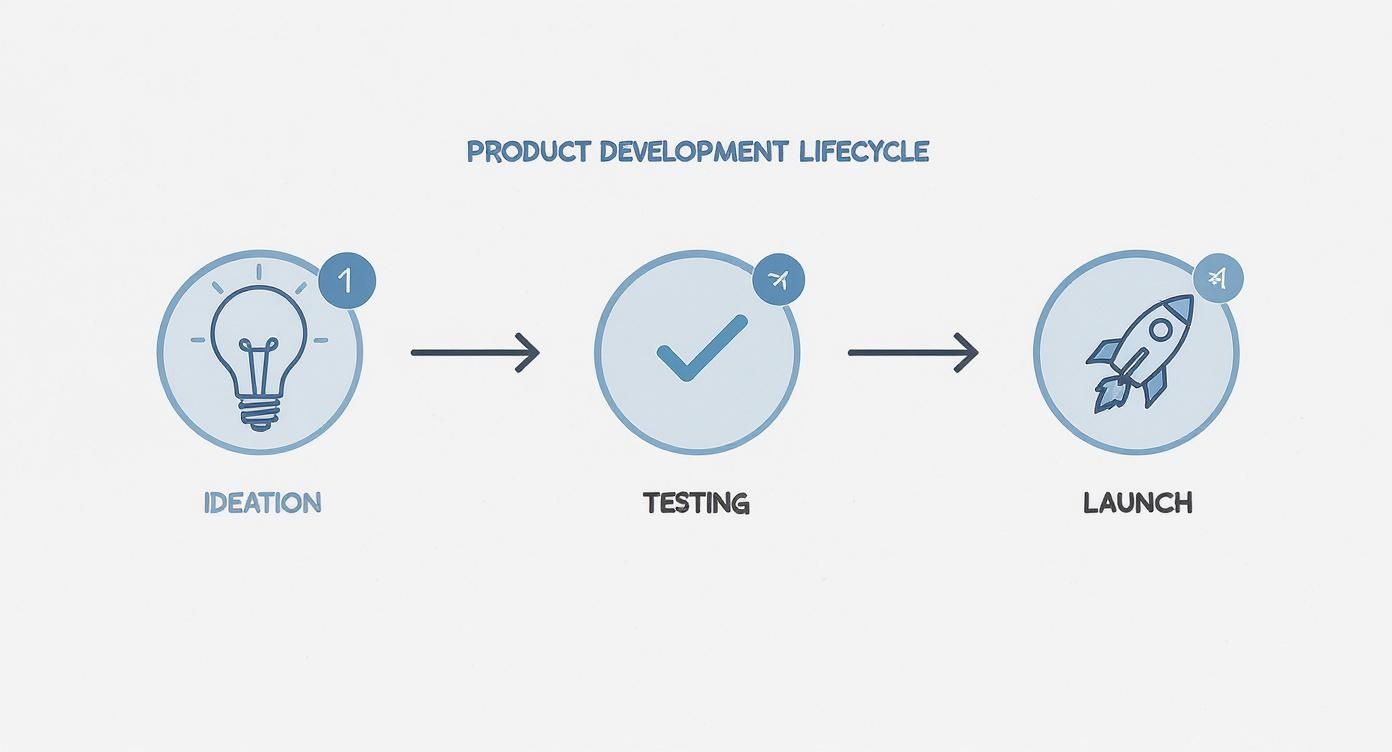
This roadmap typically winds through several key phases: ideation, validation, design, development, testing, and launch. By following these stages, teams can steer clear of common pitfalls, manage their resources wisely, and ultimately, build something that customers will actually want to use.
The Strategic Blueprint for Product Success
Imagine a chef trying to invent a new signature dish. They wouldn't just start tossing ingredients into a pan hoping for the best. That’s a recipe for disaster. Instead, they follow a deliberate process—dreaming up the concept, testing flavor combinations, perfecting the presentation, and finally, adding it to the menu.
The product development lifecycle is that exact process for creating products. It's a strategic framework that turns a great idea into a tangible, successful reality. Without this kind of structured approach, you're essentially just guessing, which often leads to wasted time, blown budgets, and a product that misses the mark entirely.
Why a Structured Lifecycle Matters
A well-defined lifecycle brings order to what can otherwise be a chaotic and unpredictable process. It ensures that every action has a purpose and that each stage logically builds on the last. You wouldn't build the roof of a house before laying the foundation, and the same principle applies here.
This methodical approach delivers some serious advantages:
- Reduced Risk: Validating ideas and testing prototypes early on helps you spot fatal flaws before they become expensive disasters. An actionable insight here is to budget at least 10% of your initial project timeline for validation; it will save you multiples of that down the road.
- Smarter Resource Management: With a clear plan, you can allocate your budget, team, and time far more effectively. For example, knowing you have a two-week design sprint allows you to book specific designer time, preventing resource conflicts.
- Better Team Alignment: When everyone—from engineers and designers to marketers and sales—understands the goals and their role, things just run smoother. A practical tip is to hold a brief, cross-departmental kickoff meeting at the start of each stage.
- A Laser Focus on the Customer: The entire process is designed to keep the user's needs front and center, ensuring you're solving a genuine problem.
To give you a better sense of how this all fits together, here’s a quick overview of the key stages in the product development lifecycle.
An Overview of the Product Development Lifecycle Stages
This table breaks down each stage, its primary goal, and the key activities involved in bringing a product from a simple idea to a market-ready solution.
| Stage | Primary Objective | Key Activities |
|---|---|---|
| Ideation | Generate and refine new product concepts. | Brainstorming, market research, competitive analysis, identifying pain points. |
| Validation | Confirm the idea solves a real problem for users. | Creating a Minimum Viable Product (MVP), user interviews, surveys, proof of concept. |
| Design | Create the product's blueprint and user experience. | Wireframing, prototyping, user interface (UI) and user experience (UX) design. |
| Development | Build the actual, functional product. | Writing code, building infrastructure, front-end and back-end development. |
| Testing | Ensure the product is high-quality and bug-free. | Quality assurance (QA) testing, user acceptance testing (UAT), beta testing. |
| Launch | Introduce the product to the market. | Marketing campaigns, sales training, final deployment, gathering initial feedback. |
Each step is a critical building block, paving the way for the next.
The infographic below visualizes this journey, showing the natural progression from that first lightbulb moment to a successful market launch.
Ultimately, mastering these product development lifecycle stages is what separates the companies that consistently innovate from those that just have good ideas. It's the discipline and structure that truly bring a vision to life.
Stage One: Sparking and Capturing Great Ideas
Every truly great product doesn't start in a boardroom; it starts with a spark. That initial flicker of an idea that promises to solve a real, human problem. This first stage of the product development lifecycle is all about cultivating an environment where these sparks can catch fire and then capturing them before they burn out.
Forget about forced brainstorming sessions. This is less about inventing something from thin air and more about being a sharp-eyed explorer. Your mission is to discover the problems hiding in plain sight. The most successful products aren't born from a vague desire to build something "cool"—they come from a deep understanding of a specific frustration.
Finding Problems Worth Solving
Instead of asking, "What can we build?" a much better question is, "What hurts?" This is the essence of 'pain-point' analysis. Start by looking for friction—in your own workday, in your industry, or in the daily lives of potential customers. What's clunky, confusing, or just plain slow? That's where you'll find gold. A practical example: the founders of Dropbox were frustrated by forgetting their USB drives, a simple, personal pain point that led to a multi-billion dollar company.
Another fantastic technique is customer journey mapping. Literally map out every single step someone takes to get something done, whether it's booking a flight or managing a team project. Every roadblock, every moment of confusion, every sigh of frustration is a potential product idea just waiting to be explored.
The most transformative ideas often start as internal solutions to immediate, tangible problems. This is because the pain point is real, the need is urgent, and the first user (you) is readily available for feedback.
Just look at the story of Slack. It was never meant to be the communication platform we know today. The founders were actually building a video game called Glitch. To help their remote team collaborate, they built a simple internal chat tool. The game ended up flopping, but they quickly realized the chat tool they'd built for themselves was incredibly valuable. Slack was born from solving their own very real, very specific problem.
Building Your Idea Pipeline
An idea is a fleeting thing. If you don't write it down, it's gone. That's why having a simple, accessible system for collecting these sparks is non-negotiable. Think of it as your 'idea pipeline'—a central hub where every concept, no matter how wild or half-baked, can be logged without judgment.
You don't need a complicated setup. A few simple tools work wonders:
- A dedicated Trello board: A few columns like "New Ideas," "Exploring," and "Backlog" is all you need to get started. An actionable tip is to create a card template with fields like "Problem," "Proposed Solution," and "Affected User" to give ideas structure from the start.
- A shared Google Doc: A dead-simple, low-friction way for anyone on the team to drop in a thought whenever inspiration strikes.
- A specific Slack channel: Create a
#bright-ideaschannel where team members can quickly post links, screenshots, and shower thoughts.
The single most important rule here is to capture first, judge later. Don't shoot ideas down as they come in. Premature criticism is the fastest way to kill creativity and you might just dismiss a concept with huge potential. This open-minded approach is a core tenet of a much larger framework, and you can see how it fits into the bigger picture by exploring the design thinking process steps.
For now, just focus on building a rich, diverse pool of problems to solve. We'll worry about which ones are worth pursuing later.
Stage Two: Validating Your Concept with Real Data
An idea, no matter how brilliant it seems in your head, is just a starting point. This next stage is all about stress-testing that idea against reality. It's your built-in defense against one of the biggest product killers: building something nobody actually wants.
Here, you'll shift gears from creative brainstorming to critical, data-driven analysis. The goal is to answer one simple but crucial question: Does this product solve a real problem for a specific group of people who are willing to open their wallets for it? It’s time to trade your assumptions for hard evidence.
Building Your Business Case
Before you even think about talking to potential customers, you need to do your homework. Building a solid business case starts with a 360-degree view of the market you’re about to enter.
First, take a deep dive into your competition. Who’s already out there trying to solve this problem? Analyze their products, pinpoint their strengths and weaknesses, and figure out how they’ve positioned themselves. For a practical example, if you're building a new project management tool, you'd analyze Trello's simplicity (strength) versus its lack of robust reporting features (weakness). This isn't about copying what they do; it's about finding the gaps they’ve missed and identifying where you can deliver something far better.
Next, it’s time for a classic SWOT analysis. This framework is simple, but it’s incredibly powerful for organizing your thoughts and clarifying your strategic position.
- Strengths: What internal advantages does your idea have? Is your tech unique? Your team’s expertise?
- Weaknesses: Be honest. Where is your concept vulnerable? Are there resource gaps?
- Opportunities: What's happening in the market you can jump on? Are there new trends or underserved niches?
- Threats: What external challenges could derail you? Think new competitors, shifting regulations, or changing customer behaviors.
This initial research is the foundation for your entire validation strategy. It gives you the context you need for how to validate a business idea with focus and purpose.
From Hypothesis to Minimum Viable Product
With your research in hand, you're ready to test your core assumptions with real people. The best way to do this is by creating a Minimum Viable Product (MVP). Now, an MVP isn't just a half-baked version of your final product. It's the simplest possible version that delivers the core value to your first-ever users.
Think of it like launching a new restaurant. You wouldn't build out a massive, expensive dining room just to see if people like your recipes. You'd start with a food truck or a pop-up stand—your MVP—to serve a few key dishes and get immediate, unfiltered feedback.
The whole point of an MVP is to maximize what you learn while minimizing your risk. It’s an experiment designed to test your most critical hypothesis—that people actually want what you're building—with the least amount of time and money.
Just look at the story of Buffer, the social media scheduling tool. Founder Joel Gascoigne didn't write a single line of code to start. He built a simple two-page website. The first page explained what Buffer would do and prompted visitors to click a button for pricing. If they clicked, they saw a pricing page. If they clicked again, they hit a page that said, "Oops, we're not quite ready yet, but sign up for updates!" This brilliant, low-cost experiment proved people were willing to pay for his idea before he invested in building it.
Actionable Validation Tactics
Beyond a full-fledged MVP, there are plenty of other clever, low-cost ways to gauge interest and gather feedback.
- Landing Page Tests: Just like Buffer did, create a simple landing page that clearly explains your value proposition. Use a tool like Unbounce or Carrd to get it live in hours. An actionable insight is to A/B test your headline to see which value proposition resonates most with visitors.
- Surveys and Interviews: Go talk to your target audience! Don't just send multiple-choice surveys; conduct open-ended interviews to truly understand their pain points. A practical tip: start your interviews with "Tell me about the last time you..." to get real stories instead of hypotheticals.
- "Wizard of Oz" Prototypes: This is a fun one. You build a front-end that looks and feels real to the user, but all the work on the back-end is done manually by you or your team. A practical example is a food delivery service that initially takes orders via a simple website, but the founder manually calls the restaurant and a courier to fulfill it. It’s a fantastic way to test a complex service without having to build all the complicated technology first.
Validation isn't a "nice-to-have" anymore; it's a necessity. A global survey found that a whopping 78% of companies now run formal user testing before committing to full-scale development. And the results speak for themselves. This upfront work leads to a 40% reduction in post-launch bugs, and teams that use MVPs are 50% more likely to catch critical issues early on. You can dig into more stats on how user feedback shapes development over on careerfoundry.com.
Ultimately, this data-first approach ensures you're building on a foundation of proven demand, not just wishful thinking.
Stage Three: Designing and Prototyping the User Experience
You’ve validated your concept, and now it's time to bring that idea to life. This is where the product starts to take shape visually, moving from an abstract thought into something people can actually see and interact with.
Think of this stage like an architect drafting detailed blueprints before construction begins. That careful planning ensures the final building isn't just nice to look at, but is also functional and intuitive for the people inside. It’s all about creating a solid foundation for the user.
The focus here is squarely on the user experience (UX) and user interface (UI). UX covers the entire feeling a person has when using your product, while UI is the specific collection of screens, buttons, and visual bits they interact with. A great product nails both, making the user's journey feel effortless and even enjoyable. Skipping this step is a classic mistake that leads to products that might work, but are a pain to actually use.
From Simple Sketches to Interactive Prototypes
Good design isn't a single event; it's a journey from rough, low-fidelity sketches to polished, interactive models. This step-by-step process lets you test your assumptions and get feedback early and often, which can save you a massive amount of development time later on.
The path usually looks something like this:
- User Flow Mapping: Before you even think about designing a screen, you need to map out the user's journey. These are essentially flowcharts that outline every single step a user takes to get something done, whether it's signing up or sending a message. An actionable tip: use a tool like Miro or Whimsical to create and share these flows with your team for collaborative feedback.
- Low-Fidelity Wireframes: Next come the basic sketches. Think simple black-and-white boxes showing where things go. Often done with pen and paper or basic software, they focus only on structure and layout—no colors, fonts, or fancy graphics yet.
- High-Fidelity Mockups: With the structure locked in, designers create detailed, static images of each screen. These look almost identical to the final product, showing off the branding, colors, and typography.
- Interactive Prototypes: Finally, these mockups are stitched together using tools like Figma or Adobe XD. The result is a clickable prototype that simulates the real product, allowing for incredibly realistic testing before a single line of code is written.
If you want to get a better handle on creating these essential structural blueprints, our guide on how to create wireframes is a great place to start.
Practical Application: A Fintech App Prototype
Let's say a team is building a new fintech app. Their main goal is to make sending money to a friend incredibly simple. After mapping out the user flow, they build an interactive prototype that lets people walk through the entire process.
They can put this prototype in front of potential users and watch them try to complete the task. A practical insight is to give them a specific task, like "Send $20 to Jane for lunch," and observe without giving hints. Where do they get stuck? Which buttons do they miss? Observing these reactions provides priceless, real-world feedback.
This cycle of designing, testing, and refining is the best way to lower risk. You find and fix usability issues when they are cheap and easy to solve—in the design phase—instead of waiting until they are expensive and difficult to fix during development.
This approach grounds your product in a deep understanding of your users. By the time the final designs are handed over to the engineers, you can be confident you're building something people won't just understand, but will actually enjoy using. This methodical process is a key part of the modern product development lifecycle stages.
Stage Four: Building and Testing Your Product
This is where the rubber meets the road. All the research, designs, and prototypes come together as your development team starts the real work of writing code and building the product’s architecture. It’s the incredibly exciting moment when your vision starts to become something tangible that people can actually use.
Gone are the days of building an entire product in one long, drawn-out sequence. Modern teams have embraced much more dynamic, iterative approaches like Agile and Scrum. These frameworks break down the monumental task of building a product into small, manageable work cycles called sprints.
A typical sprint lasts anywhere from one to three weeks and centers on delivering a specific batch of features. This method lets teams build, test, and gather feedback in quick succession, which keeps the whole process flexible and far more responsive to change.
The Power of Sprints and Iterative Building
Let's imagine a team is adding a new calendar feature to a project management tool. In the old world, they might have vanished for three months to build the whole thing in one go.
With an Agile approach, they'd tackle it differently. They might set up a two-week sprint with just one goal: build the basic ability to add and view an event. This short burst of focused work delivers a small but complete piece of functionality very quickly. At the sprint’s end, they have a working component that can be reviewed and tested, providing instant feedback for the next round of development. This iterative cycle is a cornerstone of modern software development best practices and keeps the project on track and aligned with what users actually need.
Testing and Development: A Parallel Journey
One of the biggest shifts in modern product development is realizing that testing isn't just something you do at the end. Instead, development and testing are parallel tracks that run continuously throughout every single sprint. This approach is absolutely essential for catching bugs early, back when they’re still easy and cheap to fix.
The old "build first, test later" model is a recipe for missed deadlines and buggy launches. By integrating quality assurance (QA) directly into the development sprint, teams build quality into the product from the very first line of code.
This simultaneous process isn’t just one type of testing; it involves several layers, each serving a distinct purpose.
Essential Testing Types in Product Development
To make sure the final product is stable and reliable, teams rely on a whole suite of testing methods. Each one looks at the product from a different angle, creating a comprehensive safety net for quality.
Here are the most critical types you'll see:
- Unit Tests: Think of these as the first line of defense. They are small, automated tests developers write to verify that individual pieces of code—like a single function—work exactly as intended. A practical example is a test for a "calculate total price" function to ensure it always returns the correct sum with tax.
- Integration Tests: Once the individual units are confirmed to be working, integration tests make sure they all play nicely together. This is key for spotting problems in how different parts of the software interact. For example, ensuring the "Add to Cart" button correctly updates the shopping cart total.
- End-to-End (E2E) Tests: These tests mimic a real user's journey from start to finish. For our calendar example, an E2E test would automate the process of a user logging in, clicking to the calendar, creating a new event, and saving it successfully.
- User Acceptance Testing (UAT): This is the final and, arguably, most important step. Real users or project stakeholders get their hands on the feature to confirm it truly meets their needs and solves the problem it was designed for. It’s the ultimate reality check. An actionable tip: provide UAT testers with clear scenarios to test, not just vague instructions.
By weaving all these testing activities throughout each sprint of the product development lifecycle stages, teams don't just build things faster—they build them better. This constant feedback loop means that by the time a product is ready to launch, it’s already stable, user-approved, and built to last.
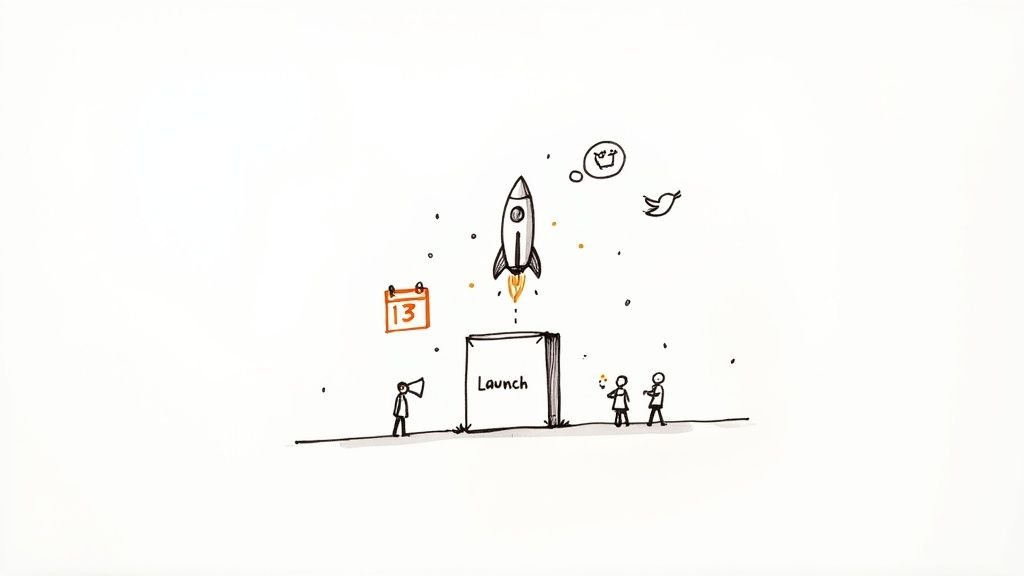
Stage Five: Launching and Bringing Your Product to Market
https://www.youtube.com/embed/2A9rkiIcnVI
This is it. After all the brainstorming, designing, and late-night coding sessions, it's time to show the world what you’ve built. But launching a product is much more than just hitting a “go live” button. It's a carefully planned event that sets the tone for your product's entire journey in the market. A great launch needs a solid go-to-market strategy that gets everyone in your company rowing in the same direction.
Success here really comes down to getting your marketing, sales, and customer support teams on the same page. Everyone needs to be fluent in the product's core value, armed with the right messaging, and prepared to deliver a seamless experience to your first customers. When these teams are perfectly in sync, your product makes a powerful, unified entrance.
Choosing Your Launch Strategy
There's no one-size-fits-all approach to a product launch. The path you choose should depend on your product, your target audience, and how much risk you're comfortable with. Thinking through your options is the first step toward a launch that actually works for you.
You generally have two main ways to go:
- Soft Launch: Think of this as a quiet opening. You release the product to a limited, select group—maybe a handful of loyal customers or users in a specific city. This is a fantastic way to collect real-world feedback, squash any lingering bugs, and polish your marketing message without the pressure of a massive public release. For example, a mobile game might soft-launch in a smaller country like Canada or the Philippines to test its mechanics and monetization before a global release.
- Full-Scale Launch: This is the big reveal. It's a coordinated, all-out effort across multiple channels to make as much noise as possible. We're talking press releases, social media blitzes, and ad campaigns all firing at once to build immediate momentum.
For instance, a new SaaS company might go for a full-scale launch by getting features in major tech blogs, partnering with industry influencers for a social media takeover, and giving their sales team fresh materials—all on the same day. The goal is to create a wave of buzz that makes your product impossible to ignore.
The Pre-Launch Readiness Checklist
A smooth launch is all about preparation and sweating the small stuff. A detailed pre-launch checklist is your best friend here, ensuring that no critical task gets missed in the final countdown. It’s your mission control, keeping all the moving parts aligned and confirming that your team is truly ready.
Having a structured process isn't just about being organized; it's about getting better results. Companies that follow a formalized product development process see a 66% higher alignment between what they planned and what they actually achieved. That kind of clarity makes all the difference.
This level of planning is crucial for long-term success, too. Organizations with detailed roadmaps that look more than a year ahead are 2.3 times more likely to launch on schedule. On the flip side, unclear strategies are a major factor in 23% of product investment failures. You can read more about how planning impacts product development on triskellsoftware.com.
A solid plan is your most important tool for navigating the final, and often most stressful, of the product development lifecycle stages. To help you get everything in order, our comprehensive product launch checklist gives you a step-by-step guide to cover every base—from the last technical checks to making sure your marketing message hits home on launch day.
Your Top Questions About the Product Development Lifecycle, Answered
When you're in the thick of it, navigating the product development lifecycle stages can bring up a lot of practical questions. Let's tackle some of the most common ones I hear from teams on the ground.
Is the Product Development Lifecycle Always Linear?
Absolutely not. Thinking of it as a straight line from A to Z is one of the biggest misconceptions out there. In reality, it’s much more of a loop.
Modern methods, especially Agile, treat the lifecycle as an iterative process. It's completely normal to jump back and forth between stages. For example, insights from the testing phase might reveal a flaw in the user experience, sending your team right back to the design stage for a rethink. The stages give you a roadmap, but flexibility and iteration are what make a product truly great.
How Do I Choose the Right Development Methodology?
The right methodology really comes down to your project’s specific needs and, crucially, how much you don't know yet.
- Waterfall: This old-school, linear approach is best for projects where the requirements are set in stone and aren't expected to change. Imagine building a physical bridge—you need the blueprint to be perfect before you lay the first piece of steel.
- Agile (Scrum/Kanban): For most software and tech products, change is the only constant. Agile frameworks are built for this reality. They let teams adapt on the fly, respond to feedback quickly, and get value into the hands of customers much faster.
Here's the simplest way to think about it: Waterfall is about executing a known plan perfectly. Agile is about discovering the right plan by building, learning, and adjusting along the way. For software, discovery is almost always part of the game.
How Is Product Development Different From Project Management?
It's a classic mix-up, but the difference is simple: one is the journey, and the other is a single leg of that trip.
Product development is the whole strategic story—from the initial spark of an idea to bringing a product to market and nurturing it over its entire life. Project management is the tactical work of getting specific pieces done within that larger lifecycle.
For instance, building your Minimum Viable Product (MVP) is a project. It has a defined start, a finish line, and a budget. But it's just one piece of the much bigger, ongoing product development puzzle.
What Happens After the Product Launch?
The launch isn't the end; it's the real beginning. Once your product is out in the wild, the work immediately shifts to a new gear. You're now focused on tracking performance metrics, collecting real user feedback, and delivering top-notch customer support.
This kicks off the "Maturity" or "Growth" stage, where you start improving the product based on what people are actually doing with it. A practical example is using a tool like Hotjar to see heatmaps of where users are clicking, revealing opportunities to improve the UI. From there, the cycle begins all over again for every new feature or update you decide to build.
Ready to turn your product idea into a reality with a process that works? Pixel One is a digital product studio that partners with startups and established companies to guide them through every stage of the product journey. Let's build something incredible together at https://www.pixelonelabs.com.